
We know that you can create powerful apps with HTML, CSS, and JavaScript. However, using only those plain languages limits us. The limits are not on what we can do, but rather on the effort we need to use. In fact, we only HTML, CSS, and JavaScript you can do anything. It’s just that doing so will require a lot of time. Since time is precious, we need a better alternative, a framework to be faster. Vue.js is just that, so in this tutorial, we will help you getting started with Vue.js.
Today we see how to set up a Vue.js project. We are going to use Node.js, see .vue files and more. As such, if you really want to get the most out of this tutorial, you should be familiar with JavaScript already. In case you need a refresher, you should start here.
What is Vue.js?
Vue is a Progressive JavaScript Framework. For us, the most important keyword here is framework. Like many other frameworks, such as Angular or React, Vue.js allows us to write better and more maintainable frontend code. It is a powerful extension to plain JavaScript, HTML, and CSS.
Progressive means that you can rollout Vue.js progressively through your app. Indeed, you may have a large website that is already live and serving users. You don’t need to rewrite it all at once to use Vue. Instead, you can start by using Vue in only one part of the website, and expanding from that. That’s the concept of progression.
Everything may appear a little fussy now, and that’s okay. Those concepts may seem very abstract, but the moment we dive into implementation you will see how real they can get.
Furthermore, on the Official Vue.js website, they stress that Vue is:
- Approachable, because you can start to use it very quickly if you already know HTML, CSS, and JavaScript.
- Versatile, because you can use it as little or as much as you want in your app.
- Performant, fast to execute, and load.
For those reasons we picked Vue.js over the other frameworks, not only for this tutorial and course but also for other apps we are developing.
Installing Vue
With plain JavaScript, all you have to do is write your code. Vue is a framework, so we need to install it before we can write code. There are several ways to install Vue.js, but we will go with the best and more reliable one: Node.js.
Getting Started with Node
The first thing you want to ensure is that you have Node.js and npm installed on your PC. They both come together with the same installation, and you can find the installers on the official Node download page. Pick the one for your OS and just go through the next-next installation process.
Once you have completed the installation, you should open the prompt (or Terminal if you are on Linux or Mac OS) and check if everything is alright. You do that by checking the Node.js version that you have with the node --version command.
C:\>node --version
v12.19.0
Note that your version may differ from mine (and possibly be recent). Any version will do, it means you have installed Node.js correctly. Instead, if you don’t see a version or get an error that means you have a problem. The problem may relate that the path where your Node is not part of your PATH environment variable. Check this Stackoverflow post for more help.
Following the same approach, you can also check the version of npm with npm --version.
C:\>npm --version
6.14.4
Now, remember that Node is the engine that can execute JavaScript on your PC (outside of a browser). Instead, NPM is the installer, that helps you install modules and libraries (i.e. extra code made from others) into your application.
Creating a Project with NPM
Now that we are all set with node and NPM, we can create a project with it. To put it simply, this means we are creating a folder that we will use to organize the code for our application. Not only this folder will contain our code, it will also contain the dependencies that we have and some configuration settings that tell both npm and node how to deal with the code.
This is important because node can deal with Vue.js but it needs to be configured to do so.
So, pick a new folder and navigate into that with the prompt (using cd). Alternatively, you can open the folder in Microsoft Visual Studio Code and then use the terminal window you have at the bottom.
In any case, once your terminal is in your folder you can run npm init. This will ask you some questions to set up your project. Take a look at the questions below.
E:\Development\full-stack-course>npm init
This utility will walk you through creating a package.json file.
It only covers the most common items, and tries to guess sensible defaults.

See `npm help json` for definitive documentation on these fields
and exactly what they do.

Use `npm install <pkg>` afterwards to install a package and
save it as a dependency in the package.json file.

Press ^C at any time to quit.
package name: (full-stack-course)
version: (1.0.0)
description: A Pretend Bakery Website to Teach Full Stack Development
entry point: (index.js)
test command:
git repository: (https://github.com/alessandromaggio/full-stack-course.git)
keywords: fullstack
author: Alessandro Maggio
license: (ISC) MIT
Right after that, it will show us a to-be package.json file to asks if it looks good. We only need to check if it contains the information we provided (and it virtually always does).
If we give it okay, it will create the package.json file in the root of the folder. This file is the configuration of our project: it defines the name, the dependencies it has, how to install it, run it, and more. It is crucial.
npm install
The package.json file that we created is just a configuration, so it tells how our project should be. Creating it does not mean that we installed the dependencies that came with it, or that our configuration is ready. Instead, we need to install them. To do that, we can run:
npm installThis command effectively means “Read the package.json file, find all the dependencies listed, and install them”. In addition to that, it also creates a new file, the package-lock.json.
This new “lock” file is a full snapshot of your dependencies, including indirect ones. In fact, in package.json you list all the dependencies your project needs to work. Yet, those dependencies will, in turn, require their own dependencies as well, and those get listed in package-lock.json.
This file is crucial because it helps you trace all the dependency chain. In this way, if one of your dependencies updates its dependencies and breaks something, you know exactly what changed. In case you are curious, you can read Should I Include package-lock.json in source control?
Since we are starting with an empty project, npm install will simply create a package-lock.json file and install no dependencies. That’s because there is none just yet.
How to Install Vue
Now, the only thing we need to do is install Vue. We can use npm for that. Not only we want to install Vue, we also want to list it in the dependencies inside package.json. We can do that automatically with the following command.
npm install --save vueThe --save option tells npm to save the dependency inside package.json. Indeed, you can now see it in the dependencies section of the file.
With this, we also installed the dependency, so a new node_modules folder has been created. This folder will contain all your dependencies, starting from Vue and any other you may want to add later. However, everything that you find here is not really your code. It is simply something you download from the Internet, and since you provide specific versions in package-lock.json, you will always download the same thing. As such, we need to exclude this folder from source control. In this way, whenever we commit with Git, this folder will be ignored.
To exclude this folder from git, simply create a file with name .gitignore. In that, in a single line, write the name of the folder: node_modules. Your .gitignore file should look like this:
node_modulesNow, Vue is installed, but we need another useful tool: the Vue CLI. This tool allows us to run our code, as well as to package it for production. We can install this dependency with the following command.
npm install -g @vue/cli-serviceUnlike --save, -g saves the dependency globally, which means it is available regardless of the project. It is useful when you have something that is not strictly related to the project. Since the CLI service allows us to set up projects, that’s a good start.
Setup the Vue.js Project
Now we are almost ready. So far, we prepared the npm project, but we did not give any configuration to Vue.js. It is time to do that now. We can do that with the following command.
vue create .We use a dot to indicate we want to create the project in the current folder. That’s what we want in this case, but in most cases, you may want to create a new folder. If that’s you, then you just have to provide an app name and a folder with the same name will appear. All default settings work like a charm.
In case you get an error saying that “vue is not recognized as a command”, it is because you don’t have your nodejs node_modules folder in your PATH environment variable.
This command will take some time, but when it finishes you will have a running vue.js project ready. You can run a development server to see it in action with npm run serve now.
This will run a demo web server on http://localhost:8080, so if you browse to that you will get something like that:
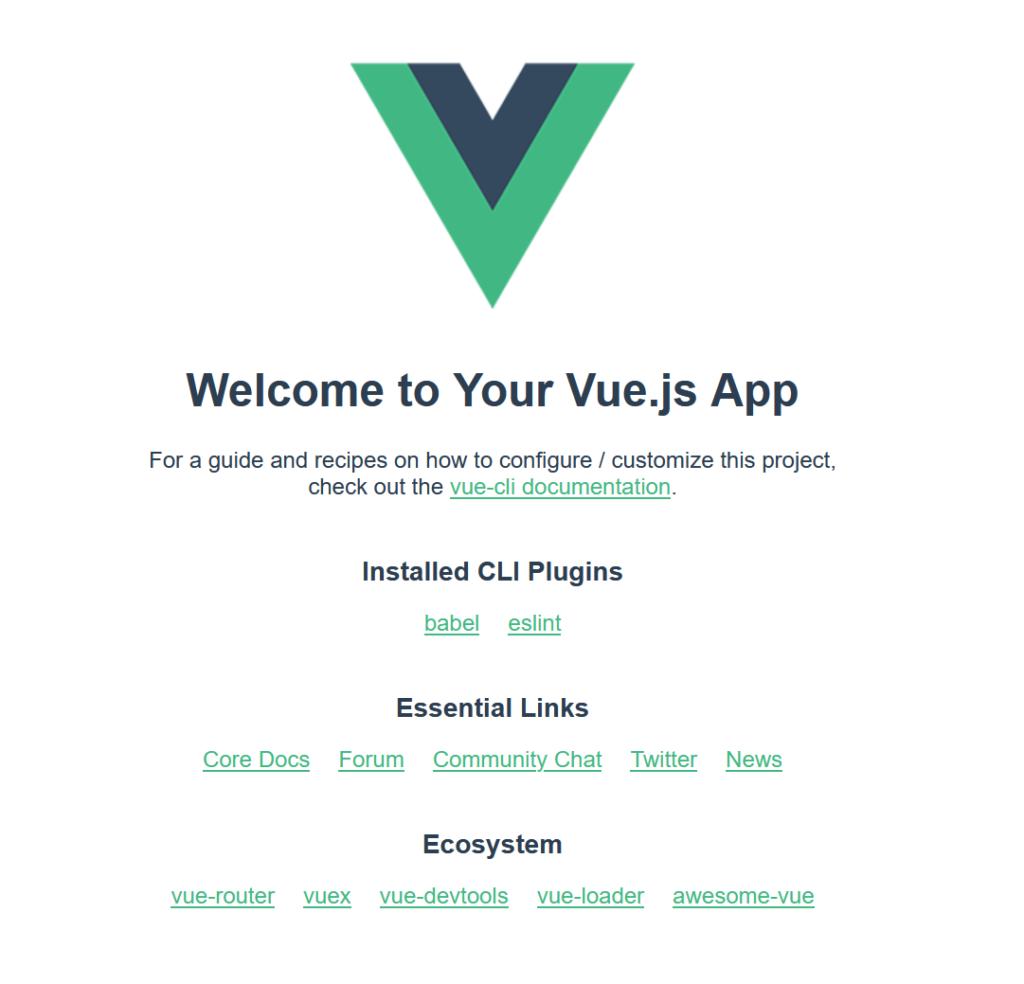
Now we are ready, everything is in place and we can start with writing code for Vue.js.
How to Use Vue.js
Understand the Project Structure
Installing Vue.js from the Vue CLI triggered some main changes to our project. Our project structure looks like the one below.
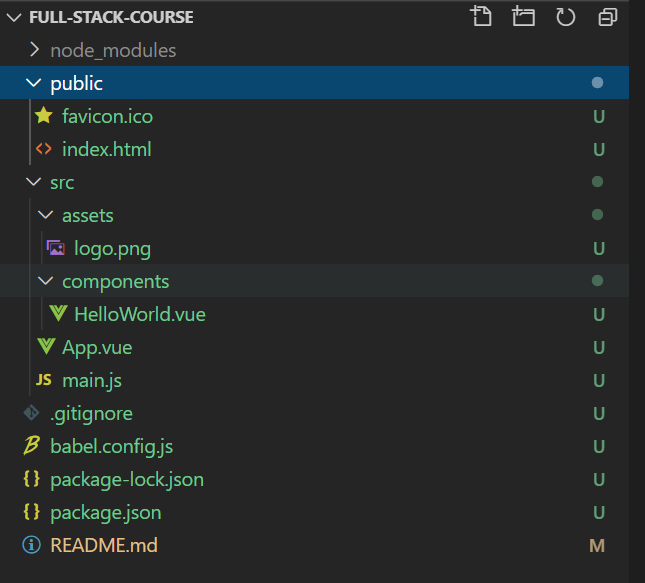
Let’s start with the basics. In the public folder, we have all static files that do not need any type of processing. Particularly, index.html is the file that will host all our application (more specifically, we will inject it there).
Then, we have the src (source) folder. That’s where the source of the application is, where all the action happens. In there, we find the assets folder to host all files that do not contain logic (static stuff like images). Unlike in the public folder, we can reference those static files from inside other Vue files.
Then, we go with the components folder. You can guess, this folder contains Vue.js components. They are a crucial component of Vue.js, and we will talk more about them later.
We also have App.vue, which is the representation of the application, and the first screen it loads. In addition, we have main.js, which is the file that takes care of loading our app.
Creating the project obviously tweaked with package.json and package-lock.json. Yet, on top of that, it also added some stuff into .gitignore and added some instructions into README.md.
Finally, we have babel.config.js. This is the configuration file for our babel plugin, a special plugin that helps us have all the advanced features of JavaScript available without worrying about backward compatibility.
Vue Components
The key concept for Vue.js is components. A component is a pluggable part of a web page that you can indeed plug wherever you want. While this may sound abstract, it is very practical.
In fact, without Vue.js we have to define our entire web page structure with HTML, in a single page. That document will contain many things that, to the user, are different parts: the navigation bar, the comment section, and more. Then, we go on with CSS, and we have the same problem: one file to add style for any different (and potentially unrelated) items. The same goes on with JavaScript, we have one file taking care of all the logic.
Components break this paradigm because they are self-contained. In a single .vue file you have everything you need: the HTML layout, the CSS style, and the JavaScript logic.
As such, each component has three parts: an HTML definition within <template>...</template> tags, the logic within <script>...</script> and optionally a style within <style>...</style>.
Before creating our own components, we need to understand how to import an existing one. Take a look inside App.vue. Here, we are using the HelloWorld component. To do that, we first need to import it inside the JavaScript section of the file, and then list it in the components part.
<script>
import HelloWorld from './components/HelloWorld.vue'

export default {
  name: 'App',
  components: {
    HelloWorld
  }
}
</script>
Now, we can use it inside the HTML just like a normal tag. We can either use Pascal Case (HelloWorld) or Kebab Case (hello-world).
<template>
  <div id="app">
    <img alt="Vue logo" src="./assets/logo.png">
    <HelloWorld msg="Welcome to Your Vue.js App"/>
  </div>
</template>
The Basics of Creating a Component
We know that a component has three parts: the logic, the template, and the style. By looking at an existing component, it may be easy to create a new one, but having an understanding is always crucial.
The part that is really in charge here is the JavaScript section. This defines the component name and how it works. Inside the script, we always need to have an export default { } part. This tells what we are exporting externally, and when other files will import from this file they are going to get everything from within the brackets.
Inside those brackets, we can define many things. At least, we need to define a component name, so that we can reference it in the HTML when importing. But that’s not it, we have many things that we can define:
propsare the parameters that we can provide with HTML when using the component.dataare similar to properties on a class instance. They are variables that store data within the component’s instance.methodsare exactly like class methods, they run code.computedare computed properties, functions that return a value so that they act as a “fake variable”. For example, if you have one prop for the first name and another for the last name, a computed property may return the full name by joining them together.
The second most critical part is the template. Inside of it, you need to have just one child, and then potentially many children from it. This is because the single child is the one that will be plugged inside the HTML when using the component. As such, the following example is wrong:
<template>
  <div>First...</div>
  <div>Second...</div>
</template>
Instead, the following example is correct:
<template>
  <div>
    <div>First...</div>
    <div>Second...</div>
  </div>
</template>
This, however, is only to give you a general understanding of components and how they work. We will dive further into that into later tutorials.
main.js
The main.js file is the file that starts your app and injects it into index.html. In case you have to use and configure dependencies for your app, you want to do it here. We can take a look at the default file.
import Vue from 'vue'
import App from './App.vue'

Vue.config.productionTip = false

new Vue({
  render: h => h(App),
}).$mount('#app')
First, we import Vue. Since we are not providing a path, it means we are importing from our dependencies from node_modules. Then, we import our application.
We configure Vue to disable the production tip, and then we go ahead with creating our application.
To create our application, we create a new Vue instance with new Vue(). In there, we provide a function to render our app, to visualize it. That is simple, we just process the App with the handler (h).
However, creating the app is not enough. We need to put it somewhere, and as such we mount it with $mount() to the elmenent that has an ID of app. If you go and open index.html, you will find such element right there. Magic explained!
In Conclusion
With this brief but intense Vue.js tutorial, we saw how to set up a Vue.js application and we started to understand its main concepts. We are now ready to start working with Vue, creating our own components and tweaking with its functionalities.
In case you are curious to see the entire code from this tutorial, you should check this project on GitHub.com at alessandromaggio/full-stack-course. For the code specific from this tutorial, take a look at this commit.


3 Responses
Comments are closed.