
JavaScript what makes your site alive. In fact, it takes care of animation, dynamic content, and “application-like” experience. In other words, it is a the foundation of the modern web. So, it is a skill you must possess if you want to work in the field. Indeed, any good Full Stack Developer will be working with this language most of the time. In this JavaScript tutorial, we will see how to start using it.
This JavaScript Tutorial is part of our Full Stack Development course. If you want to be a Full Stack Developer, you should start here.
Introducing JavaScript
Unlike HTML or CSS, JavaScript is a proper programming language. While HTML and CSS tells your PC how to display the content, JavaScript tells how to do stuff.
You can think of it as a set of imperative instructions “Do this, then do this” and so on. However, it is way more than that. For example, many actions can happen only if some events verify. The classic example here is to do something when the user presses a button.
JavaScript is easy to write and easy to run. In fact, all browsers can run JavaScript code, and this means that you can ship it on your page, pretty much like an image or a CSS file. Furthermore, servers can also run JavaScript, so you can use the very same language to process the information you receive from your users. However, for this tutorial we will focus only on client-side JavaScript, the code that runs in the browser.
Include JavaScript in Your Pages
We know that we can ship JavaScript code pretty much like an image. Then, the user’s browser will execute this code, magically. Obviously, there are some safety measures so that you cannot access things like user’s history or the files on the computer, but you can do pretty much anything a non-malicious application would need to do.
You have two ways to include JavaScript in your pages.
How To Embed JavaScript into HTML
The most straightforward way to add JavaScript to your pages is to embed it into the HTML. In other words, you write the JavaScript code directly inside the HTML file.
Obviously, the browser must know that some part of the HTML file should be interpreted as JavaScript, and not as HTML. We have a special tag for that, <script>...</script>. Inside the tag, we can write all the JavaScript code we want.
To start checking if your application works, you can use the code alert("It works"). This will open a dialog box with the text “It works” in it. So, our final result could be the following.
<script>
  alert("It works");
</script>
Where should we put this tag? Normally, as the last child of the body. In this way, the script will be loaded after the page, improving the performance. However, note that in the past the recommendation was to put it in the header so that it was the script to load faster. If the script is not crucial to displaying the page in the very first moment, the recommendation is to use it to trail the body.
Reference an External JavaScript File
Writing your JavaScript code directly in the HTML file can be cumbersome. that’s why we suggest you a better way in this JavaScript tutorial, which is pretty much what everyone does.
Just like CSS files, you can write all your JavaScript code in a separate file and then just reference it from the HTML. This will enable you to make any change in the future much quicker and easier. To do that, you still use the <script>...</script> tag, but in a different way. This time, you provide a file path in the src attribute and no content within the opening and closing tag. The result looks like this:
<script src="/path/to/my/javascript-file.js"></script>
Where should we put this tag? The same rules we used for embedding apply here as well. If it’s absolutely required for the page display from early on, in the header. Otherwise, at the end of the body.
Note that, just like any other reference such as images or CSS, you can point to external resources as well. Here’s an example.
<script src="https://cdn.jsdelivr.net/npm/vue@^2.0.0/dist/vue.min.js"></script>
Tutorial on How To Write JavaScript Code
Like any language, including English, JavaScript has its own syntax and grammar that you must know.
Separating Instruction
In the end, in JavaScript as in other programming languages, it all comes to instructions. After all, you are telling the computer what to do, and you must tell it through many small simple instructions. This means you also need to have a way to identify each individual instruction.
In English, you identify one word from another because they are separated with a space. In JavaScript, you divide instructions with a semicolon, a new line, or both.
For example, the following code is valid.
alert("First instruction, semicolon AND new line");
alert("Second instruction, new line only")
alert("Third instruction"); alert("Fourth instruction, semicolon only")
Having this freedom doesn’t mean you should mess with the code. Instead, it means you should pick your style and be consistent with it. Normally, you always want to use new lines because it makes things clearer. In fact, having each instruction on a seaparate line can boost your understanding of the code by quickly looking at it.
So, new lines are a must, but that doesn’t mean semicolon aren’t. Based on your design approach, you should evaluate if you want to add semicolon to new lines or not. We suggest you to always do that.
Writing Comments
Comments are not instructions for the computer. Instead, they are just comments or remarks you make about your code. You should use them to explain to other programmers (or to your future self) how your script is working and clarify some parts of the code.
The browser will just ignore comments when executing the code. You have two ways of writing comments: inline and multi-line.
For an inline comment, you use two forward slashes (//) and all the code following the slashes on that line will be ignored from the code. This means you can make a comment in a single line, or even on the same line with some existing code.
Instead, with multiline comments, you have to open the comment with /*, write your comment inside and then close it with */.
/*
  Multiline comment
  The user login process terminates with the alert that notifies
  the login was successful.
*/

// In-line comment: following alert to be shown on login
alert("Logged in"); // This is also in-line
Multiline comments and in-line comments should serve a different purpose. An in-line comment should provide an explanation of why a specific small instruction works in that way, on a particular line. It should provide context or detail about the line of code it is written on (or the one directly below).
Instead, multiline comments should provide an explanation of a broader context, such as an entire part of the code or of the overall process.
So, just like in the example above, it is perfectly fine – and even recommended – to have a one-line right after a multiline comment. In fact, you could add easily the comment “One-liner: following alert to be shown on login” inside the multiline comment. Yet, by not doing so, you highlight that this comment refers to the very next line, and not to a broader context.
Value Types
JavaScript can process different types of data, and you need to recognize then and be able to treat them properly.
The most common type of data is a string, which just represents a piece of text. If you want JavaScript to process a piece of text, you should enclose it within quotes (either double or single). In this way, JavaScript knows it should treat it as a piece of text.
That is just what we did with the alert() function. In fact, that function wants to know a piece of text to show in the alert, and we provided it with quotes.
alert("A piece of text with double quotes");
alert('A piece of text with single quotes');
Furthermore, you should be familiar with the concept of escaping. In fact, what happens if you actually want to write a quote inside your text. JavaScript would interpret it as “Okay, end of the string here”, but that’s not what you want.
Imagine you want to enclose the string It's working! inside single quotes. You need to escape the quote, in other words telling Javascript that the quote between It and s is not the one to end the string. It should just ignore it and treat it as a piece of string. You can do that with backslash (\).
Indeed, to escape a character you should put a backslash in front of it. So here’s the result.
alert('It\'s working!');
Double or single quote? It doesn’t really matter which one you choose, as long as you are consistent. Once you pick one, use always that one all the time in your application. Even if you are using single quotes and then you have a string with a single quote in it, prefer still quoting it with single quotes and escaping the internal quote. Don’t mix the two styles, it’s important for code readability.
JavaScript for Full Stack Developers
If you have been with us for a while, you know we are running a freel Full Stack Development course. This JavaScript tutorial is part of it, and it means we get a chance to practice what we learned.
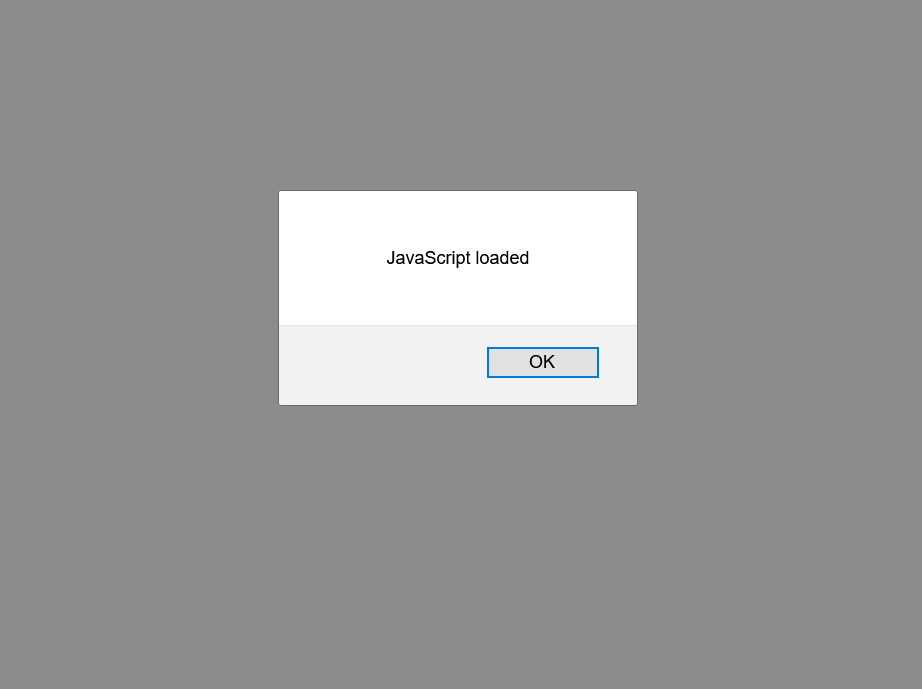
We do this practice by building a pretend bakery website as we go down the road. For this tutorial, you should just add an alert to all pages that says JavaScript loaded when the page loads. You should do that by referencing an external JavaScript file. And, in there, you should also add a comment to better describe what the line does.
This is what should happen when you load your page.
Try to do this exercise on your own before checking the solution below. Be warned, the solution is coming in the very next paragraph.
In all our pages, we already included a reference to our script.js file, which is in the js folder. This means all your page should have already a working reference that looks like <script src="js/script.js"></script>.
It is in that script.js file that we should put our alert code. The code is pretty simple, it stays just on one line, and we wanted to use semicolon to end the instruction.
Once we wrote the script, we added a comment above it as it was required. Since the requirement asks for a comment that describes the line, we went for an in-line one. And that’s the final result.
// Notify about the page load
alert("JavaScript loaded");
And this is all you need to do. If you want to check the code for this JavaScript tutorial, you should go on GitHub at alessandromaggio/full-stack-course. Specifically, if you want to check the code for this very tutorial, take a look at this commit.
In Conclusion
In this JavaScript tutorial, we only gave you the basics concepts of JavaScript. Now, you should have a solid understanding on how to insert JS code in your page and why to do it.
In the following post, we will start to see how we can manipulate our page with JavaScript, from animations to making asynchronous requests.


3 Responses
Comments are closed.