
If you want to become a full-stack developer, you need to start somewhere. This tutorial is where. In this post, we will see how to set up a full-stack project using Visual Studio Code.
Getting The Software
If you want to set up a full-stack project, you need to have some software installed. While you can do everything just with Microsoft Visual Studio Code, I suggest going for something more. Even if you may install tons of software, that’s what you absolutely need.
- Microsoft Visual Studio Code
- Nodepad++
- XAMPP (on Windows, if you are on Linux/Mac install Apache and MySQL instead)
- Node.js
- Git and GitHub Desktop (plus, don’t forget to register to GitHub.com).
If you are confused about what they do, you can read The Software Every Full Stack Developer Needs. And, the good news is that everything is free here.
Once you have all the software on the list we can start creating our project.
How To Set Up a Full-Stack Project
Create a Git project on GitHub.com
While it may sound something fancy, a project is just a folder with a bunch of files in it. Thus, our very first next step is to create a folder. Or, better yet, we should use git to keep track of our project.
What the hell is Git? You need to know the answer to this question before continuing with this tutorial. In case you don’t, we got you covered:
- What is Git and How Developers Use It?
- How to Install Git (and Start Using It)
- How To Use Git: A Complete Tutorial
Now, just go to GitHub.com and log in with your credentials. Then, just look for the button to create a new repository (hint, it will be something like “New”). Click on it, and you will be on a page where you can name your repository and give its initial settings.
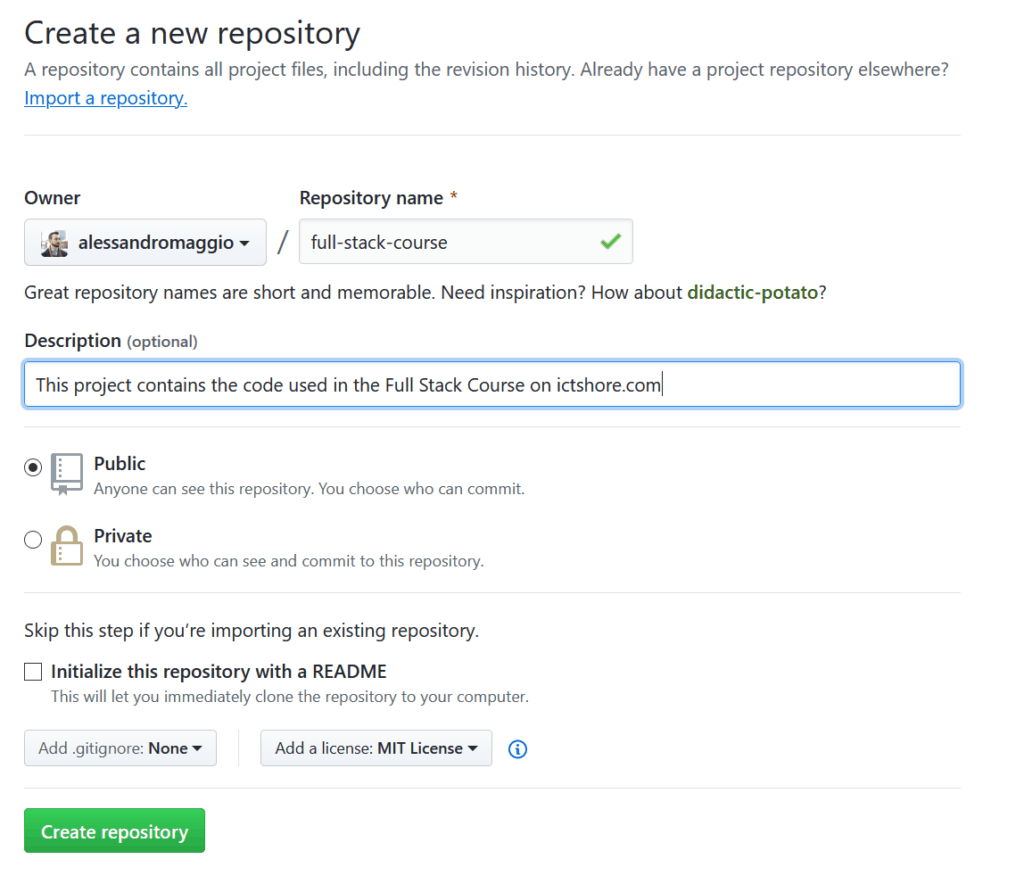
The first thing you have to do is pick a name. Here, the recommendation is a lowercase name, separating words with dashes (we call it kebab-case).
Make it public if you want anyone to see it, otherwise, make it private. In case you go for private, you may extend it to some team members later, but for now, it will be just you.
One more thing, flag Initialize this repository with a README. In this way, we can copy it on our PC. Then, hit “Create repository” to see the magic happen.
Clone the repository
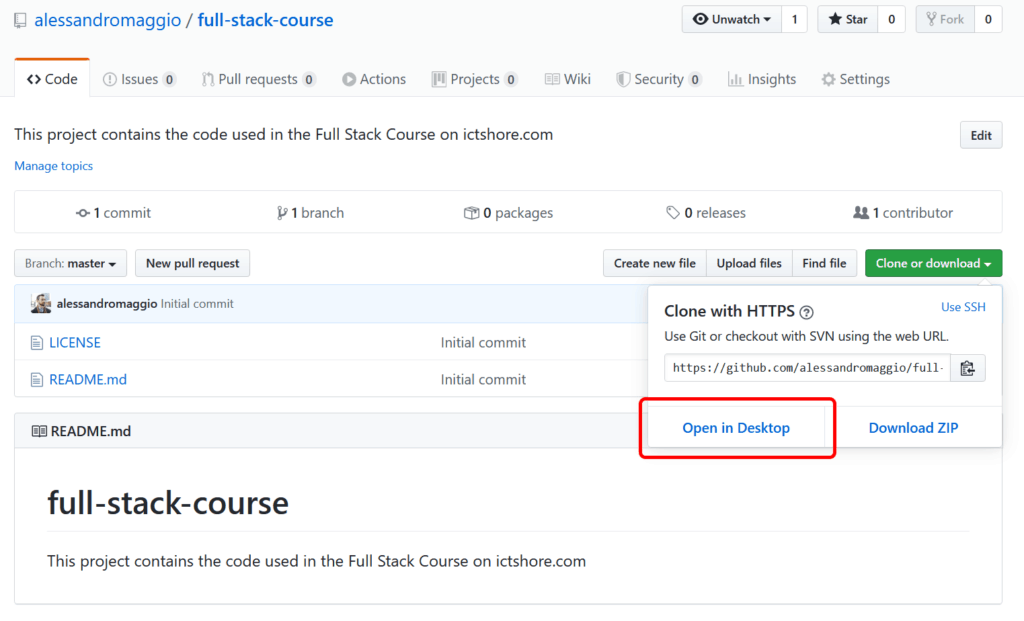
GitHub is where we store our source code, but where we work on it. Obviously, we write the code on our PC, so we need to clone the repository. This just means we need to copy it on the PC, but also enable sync so that we can copy it back to the server.
Easy enough, once we create the repository we will end up on the repository’s home. From there, look for Clone or download. Then, hit Open in Desktop. For that to work, you need to have GitHub Desktop installed on your PC.
In short, you will end up on the following screen (inside GitHub Desktop). Here, you can select the folder on your PC where you want your repository to be.
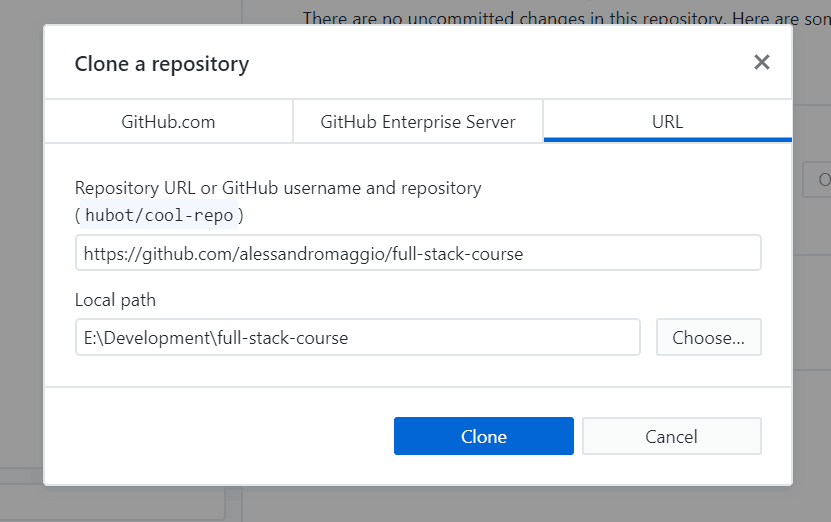
It may ask you for your GitHub credentials, in case you are a first-timer. Then, once the clone is over (a few seconds), you will have your new repository in the folder you selected. In our case, it is E:\Development\full-stack-course.
How To Set Up your Full Stack Project in Visual Studio Code
Now we have our blank project, empty, with nothing inside. It is time to open it up with our code editor, Microsoft Visual Studio Code.
Here we have two options. If you enabled that in the installation of VS Code, you can browse to the folder, right-click it, and find “Open with Code”. However, if you didn’t, just open up Visual Studio Code. Then, on the top menu use File > Open Folder and select the folder you need.
In the left column, you will see the folder structure of your project. We are just starting up, so it contains only the README file. Whenever you double-click on a file in the left column, it will appear in the center of the editor. You can even have multiple files open at the same time, they will just appear as more tabs.
Now we have created our project, and we are ready to work on it. Okay, but… what should we do? Just read on.
Structure of a Full Stack Project
A Real Full Stack
Full-stack means taking care of the entire of your application stack. Top to bottom, start to finish. We need to work on many different aspects, like the backend, the compilation of the frontend application, static assets, and more.
All of that is fancy, but it requires a good folder structure. For now, just know you should have two main folders:
/src(short four source) contains all your source code (the code you write and modify)/dist(short for distribution) contains the compiled code. This code is automatically generated from your source code, and it is the code you ship to your server – and users.
Now, since we will have to work with frontend and backend, you should repeat this structure for each of them. A good strategy is to create a client folder for the frontend, and a server folder for the backend. Thus, you will have /client/src and /client/dist, plus /server/src and /server/dist.
To work well with this structure, we need to know many things, including Javascript and a little bit of DevOps maybe. In other words, we need to connect all the dots, dots we don’t have right now. So, don’t create this folder structure just yet, if you are starting out. I have something simpler.
A Simple Structure for Frontend only
The first thing you should try to learn is how to create a web page. Not only this is the simplest thing to learn, but it is also the thing upon which everything else is based. Thus, we should focus our initial efforts on a structure to create a legacy website. This structure is much simpler to work with at the beginning. Of course, we will have to change that later.
Here you have it.
cssWill contain the style instructions for your pagejsContains JavaScript filesassetsWill contain other static assets, mainly images
So create those folders. Then, create a file and name it index.html. To create a folder or a file, use always Microsoft Visual Studio Code. In the left column, just right-click and use New Folder and New File options.
Now, index.html is a special file name. It is the index file, in other words, the default file. When the user browses to our site, he doesn’t look for any particular file, he will get this one.
Edit your index.html file and put in it something like the code below.
<!DOCTYPE html>
<html>
  <head>
    <title>Full Stack Course!</title>
  </head>
  <body>
    <h1>This is the beginning of amazing journey...</h1>
    <p>...to become a full-stack developer!</p>
  </body>
</html>
Then, you can open your file in the browser. To do that, open any browser such as Firefox or Chrome, and in the URL bar just type file:// at the beginning, followed by the path of the file. In our case, it is file://E:/Development/full-stack-course/index.html.
Pushing it back to GitHub.com
Now that we made some changes, we need to update GitHub.com. If you open GitHub Desktop, you will see it sees the new file. We need to create a commit, such, and give a description to it. In this case, we keep things simple and we use “Create index file” as a description. Then, we hit commit and then we hit “Commit to master”, and “Push origin” on the top-right after that.
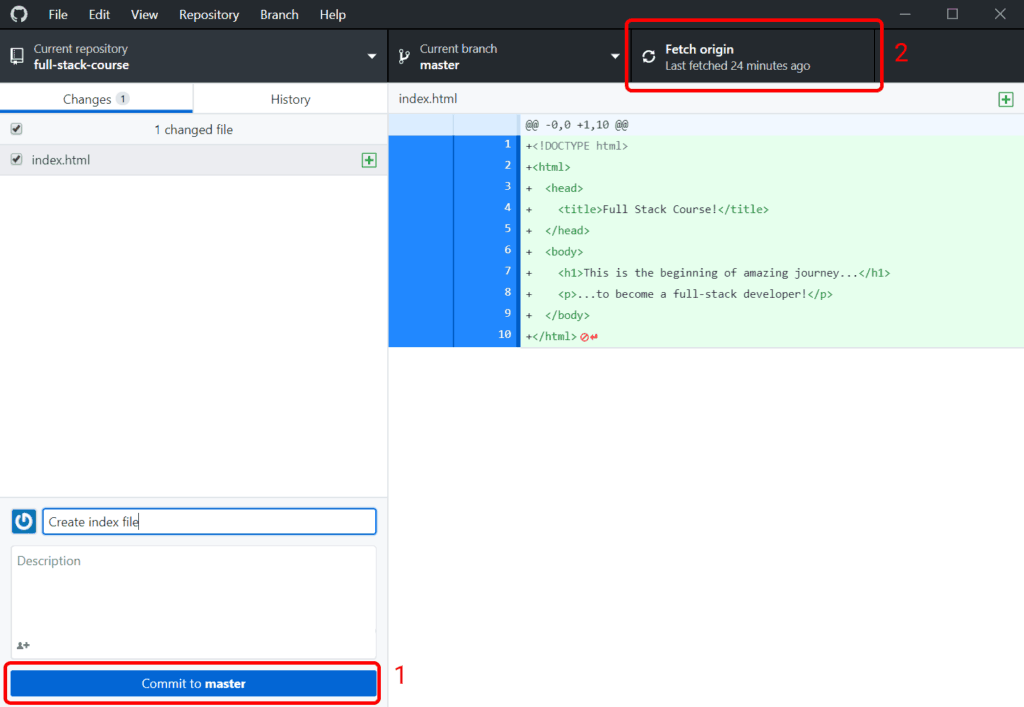
Now that here you see only the index file and not the folders. That’s because git will ignore folders as long as they are empty. Once you finish the push, the index.html file will appear also in the project on GitHub.com.
Congratulations! You have now set up a Visual Studio Code to work with a full-stack project. Or, to be more accurate, to start learning how to do it!
In Summary
In this quick tutorial on how to set up a full-stack project in Microsoft VS Code, we saw how to create a project, clone it on the desktop, and edit files. We are now all set to start working on the actual code, without having to worry about setting up our PC.
Bonus: I actually created this project on GitHub.com for real, you can follow how it evolves at alessandromaggio/full-stack-course. This is the version of this post.

