In the last few articles, we started to learn Python. Why would a network engineer learn this programming language? Our job is evolving, adapting to new technologies – thus we must adapt as well. The network engineer of today is not the same as the one of ten years ago. In ten years more SDN will definitely disrupt our job, we can ride this wave or suffocate underneath. With this article, we start a Python SDN project that will get you going with SDN.
SDN is coming
For those still new to this technology, SDN is the acronym of Software-Defined Networking. With this technology, you have a set of appliances that aim to ease the life of network engineers. You can forget configuring VLANs and ports – the software will do it for you. It is not a simple centralized console of management, it has some intelligence. To an SDN platform, you don’t tell to create VLANs: you tell to deploy a new site. It will take care of deploying new VLANs, adding routes, and configuring ports.
Because of that, I’ve seen this sentence on LinkedIn recently.
Dear CCIE, Python is going to take your job.
While this is not completely true, it shows how powerful SDN can be. It can reduce the tasks a network engineer needs to do, thus reducing the number of network engineers needed. If you don’t learn how to deal with SDN, be sure that SDN will know how to deal with you.
More about SDN…
If you want to know more about SDN in general, take a look at this article on Network Programmability. It explains SDN according to the CCNA Curriculum, without diving into technical details nor programming stuff. Is SDN real? You can bet! SDN solutions already exist, and companies are adopting them now more than ever.
Introducing our Python SDN Project
The goal
With our Python SDN project, our goal is to create tools that are able to execute stuff on network devices. Our program will interact with them, learn from them and change their configuration. How to use it, what to implement with it – it is exclusively up to you. With this and the following articles, we will create something that can do the following tasks.
- Connect devices using Telnet and SSH
- Send configuration commands and verify they were executed
- Perform troubleshooting commands and read their output
- Use SNMP to read the device status and to alter the configuration
- Receive Syslog messages
These are the weapons of our system. By the end of our Python SDN project, it will know how to fire with them. Where to aim, this is up to you. However, we will point you in the right direction during these articles.
Everything is on GitHub
GitHub is the leading platform for hosting source code for open-source projects. We have been developing this project step-by-step, and everything is documented on GitHub. Here you can get the code and browse to changes over time. Just follow our sdncore project.
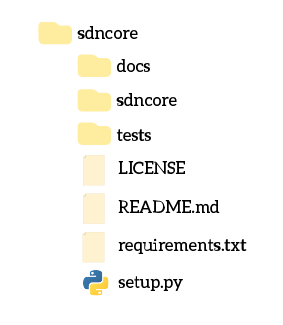
The anatomy of our Python SDN Project
Who starts in the right way is already halfway there. Thus, we need to create a convenient folder structure for our project. We can achieve this structure by adopting the best practices. Here is what the root of our project looks like.
Here is an important tip. Since we are going to work with a lot of files and folders, and even some complex scripts, we simply cannot rely on Notepad or even Notepad++. We need a better solution to write our code, and luckily we have one. You can download for free the community edition of PyCharm, it has everything you need to work with python.
Connecting to devices in Telnet with Python
SDN means managing a network, and what network would it be without network devices? We need to connect to them as the very first thing. Today we are going to see how this is possible with Telnet. Telnet is a well-known protocol that emulates terminals without encryption. In other words, it allows you to communicate with a target device using just text – and without any level of security. Even if this is not the best choice, some networks may still use it. Furthermore, it is simple to understand and implement. We must have it in our project!
Our terminal emulation module
We can start by creating a vty module in our sdncore folder. As always, we create an empty __init__.py file, and we start by creating a sub-module called drivers. Here we add a new __init__.py file, a driver.py and a telnet.py.
Why all of that? With our vty module, we want to connect to a device regardless of the protocol – Telnet or SSH. Later on in this project, we will create a class that handles that connection. However, we need to implement the drivers to do that with Telnet and SSH. Today, we start by implementing the Telnet driver. The cherry on the cake is the driver.py files, it defines how a driver should be.
The driver
The first thing in our Python SDN project is the driver file. We are going to model our telnet driver according to how a driver should be, thus we need to define it first. The driver will handle the connection to the device, thus it must implement these features:
- Open the connection to an IP and port, optionally with authentication
- Send text
- Receive text
- Close the connection
Thus, our driver.py file is pretty simple.
class Driver:
    def __init__(self, target, port, username, password):
        raise NotImplementedError()

    def open(self):
        raise NotImplementedError()

    def send_text(self, text):
        raise NotImplementedError()

    def read_until(self, text, timeout):
        raise NotImplementedError()

    def read_eof(self):
        raise NotImplementedError()

    def expect(self, expr_list, timeout):
        raise NotImplementedError

    def close(self):
        raise NotImplementedError()
Since we are explaining the script step-by-step, we are omitting the docstrings. If you want to read them, please browse our GitHub Python SDN project. However, here is a quick explanation.
By instantiating the driver, you prepare it for the connection giving all it needs to connect. With open(), you effectively start the connection. read_until() will read all text until a given string is found, while read_eof() will read as long as there is something to read (until end of file). Instead, expect() sits and wait until a given text (or list of text) appears.
A custom Error class
Our telnet script may rise some errors, while our SSH script may raise some others. We need to standardize this kind of error so that sdncore can handle them. For that, we add the DriverError class in the driver.py file.
class DriverError(Exception):
    pass
The Telnet connection
Now it is time to define our telnet.py file. To connect to a device in telnet, we are going to use a standard python library: telnetlib. Using it, we need to write our own driver. Nothing too complex, the Telnet object from Telnet library has some built-in methods that resemble the ones we just prepared. We are going to require a few modules, then take a look at our constructor.
from telnetlib import Telnet as TelnetClient
from .driver import Driver, DriverError
import socket


class TelnetDriver(Driver):
    def __init__(self, target, username='', password='', port=23,
                 username_finder='username: ', password_finder='password: '):
        self.target = target
        self.username = username
        self.password = password
        self.port = port
        self.username_finder = username_finder
        self.password_finder = password_finder
        self._client = TelnetClient()
As you can see, we use the parameters to instantiate our TelentClient. The fancy part is the username and password finders. We are going to use these parameters so that our client knows when it should send username and password. Here is the open() method that uses them.
def open(self):
    self._client.open(self.target, self.port)
    if self.username != '' or self.password != '':
        self.expect(self.username_finder)
        self.send_text(self.username)
        self.expect(self.password_finder)
        self.send_text(self.password
Tuning the other functions
We also need to redefine our other functions to rely on the TelnetClient. While doing so, we also need to convert any error that may arise into a DriverError.
def send_text(self, text):
    try:
        self._client.write(text.encode('ascii'))
        return True
    except socket.error:
        raise DriverError("Connection closed while sending text")

def read_until(self, text, timeout=2):
    try:
        return self._client.read_until(text.encode('ascii'), timeout)
    except EOFError:
        raise DriverError("Connection closed without receiving EOF")

def read_eof(self, timeout=2):
    return self._client.read_all()

def expect(self, expr_list, timeout=2):
    try:
        return self._client.expect(expr_list, timeout)
    except EOFError:
        raise DriverError("EOF was reached without finding the expected text")

def close(self):
    self._client.close()
Here you need to pay attention to the encoding. We are encoding the text in ASCII, as virtual terminals use that.
Testing our first Python SDN component
Now that we have our driver, we can test it. Right now we haven’t developed the vty module, so we need to try the driver itself. To do that, we need a device that will accept Telnet connections. Why not a GNS3 device? If you need help in setting it up, read our GNS3 Guide. If you don’t have the time for that, don’t worry. You can telnet on any website on port 80, like we are doing in this example.
Then, we can write a script that looks like this.
from sdncore.vty.drivers.telnet import TelnetDriver

td = TelnetDriver('ictshore.com', port=80)
td.open()
td.send_text('GET /\n')
print(td.read_eof())
td.close()
This will print to screen the HTML code we have on ICTShore.com. Extremely important, never forget about \n. This means hitting enter in the terminal, telling the device that we finished writing a command. Without that, the device will wait for some input but since no more is coming, it will eventually time out.
Wrapping it Up
Now our telnet connection script is working. We can use it to connect to a device in Telnet and perform some basic commands with it. However, we still lack the intelligence to make our connection independent from the underlying protocol – SSH or Telnet. We also lack the higher level of intelligence where the program reads and intelligently understand what a device is saying. Don’t worry, we will get to that.
For now, try your new driver and let me know what you think of it. To dive deeper, you can check the official telnetlib documentation and our GitHub sdncore project, or better yet its telnet-driver branch.
So, what do you think of SDN? Do you like the idea of having an automated software making the hard work on your behalf? Let me know what you think in the comments!

