
How many times do you write the URL of the website you want to visit? I guess you do that rarely. In fact, we have way better ways to navigate the web: we use Google, bookmarks, and links between web pages. Today we learn how to create an HTML link, the connection between pages.
If you are here, you are probably learning about HTML. However, if you feel you need a more general overview of HTML, you can start from this HTML Basics guide. Instead, here we go straight to talking about links.
HTML Links
What is an HTML Link?
An HTML link is something you click and that gets you to another web page. For example, if you search for something on Google, you will have many results. If you click on any of them, this will take you to the desired website. Each result in Google’s page is a link.
Now, originally links were mainly text. A simple and neat piece of text that you could click to go to another page. However, now they are way more than that. They are a generic “something” that you can click. Yes, they can be images or even multiple blocks of text. They can be pretty much any HTML element you want.
Now, normally a link will take you to some other web page. Despite that, there are some links that take you to different parts of the web page you are already in. Those are anchors, and we will discuss them later.
How to create an HTML Link
To create an HTML link, we need to use the tag <a>, enclosing in it the text that we want to show. We also need to provide the hypertext reference, which is simply the destination web page. We do that with the href attribute.
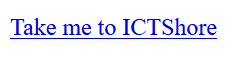
For example, imagine we want to create a link taking you to ictshore.com and with the text “Take me to ICTShore” in it. We can do it as simple as that.
<a href="https://ictshore.com">Take me to ICTShore</a>
This, by default, will yield a quite ugly yet functional result. It will look something like the one below. We could make it more beautiful by applying CSS styles to it.
What we provide in the href attribute is the URL of the resource. Basically, we are talking about what you see in the top bar of the browser, but more on that later.
Target: Open in a New Page
Sometimes, we want to create a link for our users, but we don’t want to send them away from our website. It would be much better if the new link opened in a new page, and not overriding the current one.
We can do that with the target attribute. We can provide different values for this attribute:
_selfis the default value, the one assumed if you don’t specify anything. It will cause the page to open over the current one, overriding it._blankwill open the page in a new, dedicated, browser tab._topworks essentially as_self._parentwill open the link in the parent frameset, in case you are working with frames (legacy stuff, you shouldn’t)- Additionally, if you work with frames, you can set as a target the name of a frame. However, you just shouldn’t use frames, so we won’t go into that.
So, you will essentially use this attribute in one case: when you want to open your HTML link in a new tab. If this is the case, set the target to blank, as follows.
<a target="_blank" href="https://ictshore.com">Take me to ICTShore</a>
Now, here’s the golden rule. For better user experience, always try to open in the current page. It is much more convenient on mobile, and if the user really wants it on another page, she can always right-click and select “Open in a new tab”. If you want to force the user to open in a new tab, at least do that only for links to external websites. In other words, don’t disrupt the navigation of the user.
The status of an HTML Link
By default, a link will appear as blue text with an underline. However, after you click it, it will switch to purple. Why is that? That is because your browser takes into consideration the status of the link. An HTML link can be in three states (but only one state at a time):
- Unvisited means the user has not clicked the link just yet
- Active means the user has just clicked the link and the page is loading. Back in the 90s, loading a page could take several seconds, but now it’s not the case anymore. It will be almost instantaneous, and thus you don’t need to worry much about this state.
- Visited means the user has clicked on the link at least once.
You don’t need to do anything about it. However, you can use this information when it comes to styling. In fact, in CSS, you can apply a different style for visited and unvisited links, for example.
However, let me say that unvisited and visited links are a thing from the past. Modern design practices do not encourage having a different style between links that were visited and links that weren’t. There is just no point in doing that. So, know it is possible but avoid doing it!
Brief Explanation of URLs (and HREF)
URL stands for Uniform Resource Locator, and it is a standard way (uniform) to reference (locate) content on the web. The content is not necessarily a web page, it can be a file, an image, or even something else. Hence, we use the world resource, to indicate that we use URLs to locate literally any type of resource.
We won’t go much deep in here, but just know you have three main options when it comes to an URL: full, absolute, and relative.
Full URL
A full URL can live on his own. You can take it, bring it somewhere else, even out of context, and it will work for sure. It will always point to the same resource because it does not depend on the context where it is in. For example, https://ictshore.com will always point to this website.
The full URL has specific anatomy, always with the same components.

- The protocol identifies the communication protocol to make the connection. For web pages, it will be HTTPS or HTTP. However, it may also be something like
ftp://orfile://in case you want to use those protocols. - The hostname is the name of the server where the website is hosted. In other words, the PC somewhere on the Internet that contains the files of your website. In most cases, this will be a Fully-Qualified Domain Name (FQDN), which is a fancy term to indicate the name of a server you can access over the public Internet. In some other cases, however, it may be a server private accessible only within the company. It may even be an IP address or your own computer (localhost).
- Finally, the path is the resource you want to get from that server.
You must use those URLs when referencing external resources, otherwise, they won’t work. Instead, you may choose different options when loading resources that are part of your website.
Absolute URL
An absolute URL is somewhat like the full URL, except it is not unique on the entire Internet. It is unique only for a single server. In that sense, it is similar to a path of folders on a computer.
It basically tells “I don’t care the context within this server, get me this resource”. In other words, it relies only on one context information: the server. Thus, the destination resource must be on the same server, on the same hostname.

An absolute URL is simply. It is just like a full URL, but it lacks the protocol and hostname. As such, an absolute URL must always start with a slash.
Relative URL
Relative URLs are at the opposite side of the spectrum from full URLs. They heavily rely on context information. In fact, a relative URL uses two pieces of information from the context to work properly:
- The hostname or server
- Path of the file where the link is located
Like absolute URLs, relative URLs omit protocol and hostname. However, unlike absolute URLs, relative URLs must not start with a slash. That’s the only way to discern between relative and absolute URL. Have this very clear, it works like that: /absolute/url and relative/url.

Now, how does this work? What does it mean relying on context information, and most specifically on the position of existing files? Take as an example the structure of our project.

Now, we need to use relative links to navigate the folder structure. To go up one level (to the parent folder), we use two dots ... Take a look at the following table to understand how this could work.
| From page | To page | Relative link | Absolute link |
index.html | about.html | about.html | /about.html |
index.html | baguette.jpg | assets/baguette.jpg | /assets/baguette.jpg |
style.css | baguette.jpg | ../assets/baguette.jpg | /assetts/baguette.jpg |
script.js | about.html | ../about.html | /about.html |
Relative URLs are messy. You need to update them when the destination file changes location, sure, but also when the source file changes location. Thins can get ugly real fast. Solution? Just don’t use them, go with full or absolute URLs.
Anchors
Anchors are HTML links within the same page, and strictly speaking, they are not a type of URL. Nonetheless, they are a way to identify a destination for our link.
First, you need to define some places on your page that you want to reference with links. You do that by adding an id attribute with a value that is unique within the page. Then, in a link, you just use the value of that attribute, prepended with a #. Hard? Not really, take a look.
<a href="#contact-info">How to contact us?</a>
... Some random stuff may be here ...
<p id="contact-info">Our email is about@example.com</p>
.. Other random stuff may be here as well
Of course, this will look way nicer in a real page where you have lots of content. You can do that with any element, not just paragraphs!
HTML Links in Our Project
If you are following our Full Stack Development course, we are trying things as we learn them. So, it is time to put into practice our new knowledge about HTML links.
And hey, if you aren’t following our course you should, and you should definitely try things out. Otherwise, you will just lose knowledge the moment you finish reading this post! Start here instead.
Try to do the following:
- Create a new page in the site root and name it about.html, with the content you prefer.
- In
about.html, put a link at the very beginning, and name it “< Go back”. This link should point you toindex.html. Tip, you can’t use the less-than sign in HTML or it will mess up with tags, use<instead. - In
index.html, add a link to about.html in the paragraph “Who we are”. - Create an anchor on the title in
index.htmland name it “top”. Then, at the end of the page, create a link to it as “Go to top”.
Try to do this by yourself. Once you have finished, you can peek the solution on GitHub.com, or just check out the two snippets below.
This is our index.html.
<!DOCTYPE html>
<html>
  <head>
    <meta charset="utf-8">
    <title>Bakery Store</title>
    <meta name="viewport" content="width=device-width,initial-scale=1.0">
    <link rel="stylesheet" href="css/style.css"/>
    <script src="js/script.js"></script>
    <meta name="description" content="Text to appear on Google Search">
  </head>
  <body>
    <h1 id="top">Bakery store</h1>

    <h2>Who we are</h2>
    <p>This isn't just another average bakery store. <a href="/about.html">Read more...</a></p>

    <h2>Our products</h2>
    <p>We make the <b>finest</b> bakery products in town</p>

    <h3>Bread</h3>
    <img src="/assets/baguette.jpg" alt="A baguette"/>
    <p>Check out our awesome loafs</p>

    <h3>Burger buns</h3>
    <p>Yes, we make <i>burger buns</i> as well</p>
    <a href="#top">Go to top</a>
  </body>
</html>
And this is our about.html.
<!DOCTYPE html>
<html>
  <head>
    <meta charset="utf-8">
    <title>About Bakery Store</title>
    <meta name="viewport" content="width=device-width,initial-scale=1.0">
    <link rel="stylesheet" href="css/style.css"/>
    <script src="js/script.js"></script>
    <meta name="description" content="Text to appear on Google Search">
  </head>
  <body>
    <a href="/">< Back</a>
    <h1>About</h1>

    <p>This is just a random about page.</p>
  </body>
</html>
Wrap Up
In this post, we explained almost everything about HTML links. Something that may seem so trivial, in reality, has many different flavors you should be aware of. Now, you are an HTML link master.
As a bonus, don’t forget to check this full stack development course on GitHub.com at alessandromaggio/full-stack-course.

