
Some websites are simply static, in the sense that you can only browse their content. We want to go further than that, we want to interact. The best websites (and web apps) allow users to share, comment, log-in, and do many other actions. To do that, we need to use HTML forms, the HTML component for user-interaction. In this HTML tutorial, we will see how to use HTML forms and why they are important.
To talk about HTML forms, you should know the basics of HTML. If you don’t, start with this awesome tutorial.
What are HTML Forms?
Before we dive into writing some code, we can spend a few words on some theory. We’ll keep it quick!
HTML forms are collections of user inputs that allow a single interaction.
This pale definition is simpler than it seems. Think about the comments you can leave to a blog post, like this one. You will have to drop your email, your name, and the comment you want to post. All these three items are different types of inputs, but together they work toward a single interaction: commenting.
So, the form just groups all those inputs together so that you can use them to interact. Obviously, on a page you can have as many forms as you want.
Okay, but since a form is a group of inputs, what is an input?
An input is any kind of information the user can provide.
In HTML, an input may be a text. It may be a checkbox (multiple choice allowed), a radio box (single choice among many options), a drop-down, and so on.
How to Use HTML Forms?
In the end, we want our form to enable just one thing: user interaction. This is easy to understand. Once the user finishes providing all the information needed, she needs to say “Okay, I am done!”. In HTML jargon, this means she is submitting the form.
Submitting the form means that we want to send that information to our server for further processing. In the case of the comment to a blog post, the comment will be stored until someone can review it, and then it will appear on the page. After the submission, our server can return some data we can show to the user, we can load a new page or do some redirections. From all of that, we understand that we will need two things on our forms:
- A button or other way to submit the form; and
- The destination, the page of our web server that will take care of processing the data. We call this the action.
On top of that, as we will see, we will also need to provide a method for interacting with the webserver. Okay, now it’s time for some coding!
HTML Forms: The Code
The Form Tag
Today, we start from the outer layer and move inward. Whenever you need input from the user, you will need a form to enclose it. The form defines that all the inputs inside it work together, what is the action, and what is the method. We can look at an example to make things clearer.
<form method="POST" action="comment.php">
</form>
Simply enough, the tag to use is <form>...</form>. However, the two attributes we provided are mandatory:
methodcan be eitherPOSTorGET, more on that in a secondactionis the script that will process your data, typically another web page.
Obviously, without a script in the backend, without an action, our forms will be useless. But for now, we can just focus on creating the forms, later in this series of tutorials we will see some nice ways to process data.
Note: the form tag is meant to contain input, but not only inputs. It can contain paragraphs, divs, and more. You can even nest multiple items into it, as long as they are not other forms.
Method: POST vs GET
When we submit a form, we engage the action web page. Obviously, we do more than just going to that page. The browser will provide to the page the data the user has inputted in our form. The method defines how the transmission of data should be done.
The simplest is GET. With it, all the parameters and inputs you provide will appear in the URL. This is useful if you want to make shareable the interaction the form provides. For example, if your form allows you to search for posts, you may have an input named “query”, as the search query. If your action is search.php, and you search for “example” with method GET, the URL that will appear after submission will be search.php?query=example. In this way, you can take the URL from the bar and share with anyone.
Instead, POST is just the opposite of GET. Inputs won’t appear in the URL because you pass them under the hood. This is what you want when you don’t want to make the interaction shareable, like in case of login or a password reset.
Important! Using POST doesn’t mean your data is secure. It just means it doesn’t appear in the URL, but it is transmitted according to the underlying protocol. In other words, if you are using HTTP (and not HTTPS), even POST inputs will be clear text!
Introducing HTML Inputs
We have various types of input that we can configure in our web pages. Most of the time, we will do that with the <input> tag, which is self-closing. At minimum, each input must have the following attributes:
name, so that we can later reference this data in the backend. A good example of came could be “username”, “comment”, “quantity” and so on. You decide, based on what you expect the user to insert into the field. Note that is is not visible to the user. Within a form, you cannot have two inputs with the same name (but they can be in different forms). Avoid spaces in the name.- type, so that HTML knows how to render this input. For example, it may appear as a text box, or as a password box.
So, the most basic input could look like this:
<input name="username" type="text">
You can also use some addition al attributes, for example:
valueallows you to provide a default value. In this way, the input will appear pre-filled and the user can modify it if she wants.disabledmakes the field grayed out so that the user cannot enter data nor select text (in case of a text field)readonlyis similar todisabled, but the input is not grayed out and the user can select the text. She can’t edit it though. Obviously,readonlyis mutually exclusive withdisabled.
Here you have a few more examples with all this goodness.
<input name="username" type="text" value="MyUser">
<input name="username" type="text" disabled>
<input name="username" type="text" readonly>
Now we can dive into creating actual inputs.
IDs and Labels in HTML Forms
Imagine you have a bunch of inputs together, you want to tell which is which. You want the user to know where the email goes, where the comment goes, and so on.
We already know that the name is not displayed to the user, so that’s not the way to go. Instead, we need to do two things. First, we need to identify each input with an id that is unique in the entire page, and not just within the HTML form. Then, we need to create a label for that ID. How do we do that? with the id attribute and the <label>...</label> tag with the for attribute.
<label for="user">Your username:</label>
<input id="user" name="username" type="text">
Technically, you could just put a label without any reference (no for or id attributes), but the best practice tells us to do it. You could even use just a paragraph or a div. However, if we go with the best practice, the result will be something like this.

HTML Input Types
Text-based inputs
We already know the text type, but it is not the only one. We have many different types where the user can write into a box:
textfor a single-line textpasswordif we want a password input (not showing the text)numberwhen we want the user to input just numbersemailif the allowed value must be an email addressurlif the allowed value must be an URL (a link to a page)
All these values should go in the type attribute of your desired input. Nothing too fancy at this point. However, there’s a special type of text input we haven’t covered yet.
For all of those, we can put a placeholder. Simply put, a placeholder is “fake text” that will appear as long as the field is empty. As soon as the user clicks to input, it will disappear. Useful when you want to hint the user on what the field is about, like in the example below.
<input type="email" name="email" placeholder="Insert your email...">
Textarea (multi-line text)
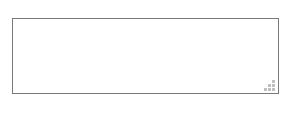
If you want a larger text input, then type=”text” is not the way to go. You want a text area, a larger piece of the page where the user can write text more freely. This has its own tag, textarea. Just like an input tag, you will need to provide a name, but not a type. Note that this tag is not self-closing.
<textarea name="comment"></textarea>
You can specify the number of lines with the rows attribute (e.g. rows="4"). And, just like text inputs, you can use a placeholder as well.
Without any styling, a textarea will look something like this. Not too fancy uh?
Checkboxes
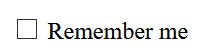
Checkboxes are small squares that the user can flag. A useful example of that is the “Remember me” box that you can tick when logging in. Simply enough, the type to use there is checkbox.
<input name="rememberme" type="checkbox">
When the user selects the checkbox, the value will be 1, otherwise, it will be 0. Later, when we work on processing the data, we will need to know that. However, we can also customize this with the value attribute if we want.
Another important thing to mention, this is one of the inputs where you want to use IDs and labels. In fact, while with thext inputs you had placeholders, with checkboxs the user just can’t know what it is unless you put a label.
<input name="rememberme" type="checkbox" id="remember">
<label for="remember">Remember me</label>
And here’s the result.
If you want to have this checkox checked by default, you can add the checked attribute like so:
<input name="rememberme" type="checkbox" checked>
Radio button
If you have multiple checkboxes, the user can select as many as she wants, from zero to all of them. Sometimes, however, that’s not what we want. Sometimes, we want to give the user a few options to choose, but one excludes all the others. This is possible with the radio input.
Simply enough, we set the type to radio. However, here we must specify a value. On top of that, we need to create multiple radio inputs with the same name, so that our browser will know they are all part of the same selection. The following example will make things much clearer.
<input id="location-rome" name="location" value="Rome" type="radio">
<label for="location-rome">Rome</label>
<input id="location-paris" name="location" value="Paris" type="radio">
<label for="location-paris">Paris</label>
<input id="location-prague" name="location" value="Prague" type="radio">
<label for="location-prague">Prague</label>
Here we are providing three inputs or just one thing, the location. That location, however, can be just one of three: Rome, Paris, or Prague. As such, all three inputs have the same name, but each must have its own different value and possibly ID and label. The final result is something like this:

Here again, if we want to have a pre-selected value we can use the checked attribute.
Dropdown
Radio buttons can be fine if you have just a bunch of options, but if you have many they are probably not the way to go. The classic example here is a selector of countries. As there are about 195 countries in the world, you don’t want to have 195 radio buttons. Instead, you want to have a better way to search for them, possibly something that appears only when you need it, and then gets out of the way.
A dropdown is the way to go. We all know what a dropdown is, however that’s not the way we call it in HTML. Instead, in HTML we call it select, because we use the <select>...</select> tag (and not input).
Inside our select, we need to list all the possible options, using the <option>...</option> tag. Each option will contain the name we want to show to the user and will have the value attribute.
We can rewrite our previous example of the three cities to be a dropdown with the following code.
<label for="loc">Select location:</label>
<select id="loc" name="location">
  <option value="Rome">Rome</option>
  <option value="Paris">Paris</option>
  <option value="Prague">Prague</option>
</select>
This will result in the following output.
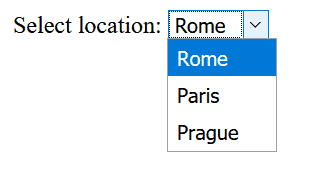
If we want a value to be selected by default, we simply add selected to that option. For example:
<option value="Prague" selected>Prague</option>
File uploads
Sometimes, we want our users to upload some files. They can be images, or even any type of files. We can do it with an input if we set the type to file.
<input type="file" name="my_file">
This will create a ugly box where the user can click “Browse” and select a file from his computer. The fill will be uploaded when the user submits the form. Note that the “Browse” text is automatically rendered in the language of the browser. In fact, you are not providing that text, the browser is.
Hidden inputs
Sometimes we want the user to provide some information unconsciously. We are talking about technical stuff that happens in the background and that doesn’t require actual input from the user. An example could be the background-check of “I am not a robot”, like if we are using Google reCAPTCHA.
We can do this with an input, if we set the type to hidden. It won’t appear at all on the screen. But don’t store sensitive information, the input is still sent to the user and visible if she inspects the HTML.
<input type="hidden" name="a_name" value="random stuff">
Submitting HTML Forms
At the beginning of this HTML tutorial on HTML forms, we understood we need to submit our forms. How to do it? We need to create some code, more specifically a button.
Here we have two options for that, but only one is right, so we can start with it. We need to add the <button>...</button> tag. Inside it, we can put the text we want to appear on the button. However, that’s not enough: we also need to set the type to submit. So here’s a working example.
<button type="submit">Post comment!</button>
And that’s it, that’s the way to do it. Now, we will show you also the “old” way to do it, the one previous to HTML 5. Don’t do it, it is bad! Just know it exists, in case you see it.
In the bad way, you create an input with type submit, and it will render as a button. You have to write the text you want to appear in the button as value of the input.
<input type="submit" value="Post comment!">
Know it, but just don’t use it. For your own sake.
There’s more on HTML forms…
What about all the other fancy way of interacting I know about? For example, dropdowns where I can filter results by searching. What about drag and drops, creating tables, or cmplex text like in word?
Well, my friend, I have bad news for you… plain HTML forms just can’t do it. You will need javascript for it. And not just a tiny bit, a lot. If these fancy forms were a recipe, javascript won’t be the salt for sure – it would be the main ingredient. So, for now, just accept we can only create crappy forms.
Heck, we cannot even do that. Sure, we can create our HTML forms, but since we can’t create our scripts to process them they are worthless. Be patient, eventually you will master everything you need to be a Full Stack Developer!
Try-It Yourself!
If you are on this page, it means you want to learn more about HTML. In fact, chances are you want to become a Full Stack Developer. If so, we have a course for that (entirely free). As part of it, we are creating a website for a pretend bakery store.
If you are following along the Full Stack Developer course, here’s what you should try to do:
#1 Add a contact form to the about page. This form should allow the user to provide email, name, and a request (larger text). The desired result is the following.

#2 Add a new page with a form to order online from the bakery. This form should allow the user to order up to 4 products, and for each to specify the quantity. Tip: the best way to go there is with a table. Name the new page order.html. The desired result should be the one below.

Try to do it yourself, and remember there is not one exact way to do it. Instead, there are many options to go. So, the ones you see below are only two proposed answers.
Again, do it for yourself before checking! That’s the whole point of the exercise!
So, here’s the contact form example.
<form action="contact.php" method="post">
  <input name="email" type="email" placeholder="Your email...">
  <input name="name" type="text" placeholder="Your name...">
  <textarea name="request" placeholder="Your request..."></textarea>
  <button type="submit">Contact us!</button>
 </form>
Here, the most important part to know is the method. You don’t want this action to be shareable, so you must use POST.
And now, an example of our order form (we are not going to show the entire page here).
<form action="order.php" method="post">
  <table>
    <thead>
    <tr>
      <th></th>
      <th>Product</th>
      <th>Quantity</th>
    </tr>
    </thead>
    <tbody>
    <tr>
      <td>Item #1</td>
      <td>
      <select name="item-1">
        <option value="None">Please select...</option>
        <option value="baguette">Baguette</option>
        <option value="croissant-empty">Croissant (no fill)</option>
        <option value="croissant-choco">Croissant Chocolate</option>
        <option value="croissant-berry">Croissant Strawberry</option>
        <option value="pizza">Handmade pizza</option>
      </select>
      </td>
      <td>
      <input name="qty-1" id="qty-1" type="number"><label for="qty-1">g</label>
      </td>
    </tr>
    <tr>
      <td>Item #2</td>
      <td>
      <select name="item-2">
        <option value="None">Please select...</option>
        <option value="baguette">Baguette</option>
        <option value="croissant-empty">Croissant (no fill)</option>
        <option value="croissant-choco">Croissant Chocolate</option>
        <option value="croissant-berry">Croissant Strawberry</option>
        <option value="pizza">Handmade pizza</option>
      </select>
      </td>
      <td>
      <input name="qty-2" id="qty-2" type="number"><label for="qty-1">g</label>
      </td>
    </tr>
    <tr>
      <td>Item #3</td>
      <td>
      <select name="item-3">
        <option value="None">Please select...</option>
        <option value="baguette">Baguette</option>
        <option value="croissant-empty">Croissant (no fill)</option>
        <option value="croissant-choco">Croissant Chocolate</option>
        <option value="croissant-berry">Croissant Strawberry</option>
        <option value="pizza">Handmade pizza</option>
      </select>
      </td>
      <td>
      <input name="qty-3" id="qty-1" type="number"><label for="qty-1">g</label>
      </td>
    </tr>
    <tr>
      <td>Item #4</td>
      <td>
      <select name="item-4">
        <option value="None">Please select...</option>
        <option value="baguette">Baguette</option>
        <option value="croissant-empty">Croissant (no fill)</option>
        <option value="croissant-choco">Croissant Chocolate</option>
        <option value="croissant-berry">Croissant Strawberry</option>
        <option value="pizza">Handmade pizza</option>
      </select>
      </td>
      <td>
      <input name="qty-4" id="qty-1" type="number"><label for="qty-1">g</label>
      </td>
    </tr>
    </tbody>
  </table>
  <button type="submit">Order now</button>
</form>
Wrapping Up
In conclusion, HTML forms are the right way to fetch user input. With this HTML tutorial, we saw how to create forms and several types of inputs, and we saw the potentiality of it.
If you are following our Full Stack Development Course, you are at a key turning point. In fact, with this post, you have an understanding of all the major parts of HTML, which means you can be ready to apply some CSS style to it. That’s what we will do in our next post.
As always, you can check the details of the examples in this post by checking this commit on GitHub. More generally, you can have a look at the repository of the entire course at alessandromaggio/full-stack-course.

