
Docker is one of the coolest technologies out there. In fact, it allows you to run small and independent services on a single piece of hardware. Those are the containers, small versions of virtual machines. Well, sort of: unlike virtual machines, they borrow some features from the OS that runs docker. As a result, they are extremely lightweight, and this makes them flexible. Containers are the next frontier of virtualization, anyone in IT should know how to use them. In this article, we explain how to use docker with a super-easy tutorial. We packed here all the knowledge you need about containers.
What is a container?
Before we can learn how to use docker, we should understand what is a container. We can start with a formal definition:
A container is a lightweight virtual machine. The same OS kernel runs all the containers on the same piece of hardware.
If you have a “traditional” virtual machine, it will have its own operating system, and you have to assign Virtual CPU cores to that VM. This is great to create full isolation, but it drains your resources quickly. In fact, imagine you have several web servers: for each, you also need to reserve CPU power and RAM space for the operating system. However, you don’t care about the Operating System: in the end, all you care about is the webserver.
Containers solve this problem by having all the containers share the same OS Kernel, the one of the docker engine. This saves a lot of resources so that you can have even containers with 50MB of RAM. In each container, you only have the service you need. Doing so enables you to run microservices: several containers, each with a simple and specific role.
The following image summarizes the difference between containers and virtual machines.

Docker is the software that runs and controls containers. Using it is extremely simple, as we will see next.
How to use Docker
Installing Docker
Of course, the first thing we need to do is installing Docker. Luckily, this is simple on both Windows and Linux. Specifically, on Windows, you simply have a wizard that does almost everything for you. On Linux, you need to use a package manager. Instead, if you are on Windows or Mac, you can simply visit the official download page.
Once you finish with the installation, you will have the docker command in the prompt or terminal. We will use that for everything in this tutorial: in fact, this is the command we use to do everything in docker. If you simply type docker in the prompt, you will get the help message:
C:\>docker

Usage:  docker [OPTIONS] COMMAND

A self-sufficient runtime for containers

Options:
      --config string      Location of client config files (default
                           "C:\\Users\\Alessandro Maggio\\.docker")
  -D, --debug              Enable debug mode
  -H, --host list          Daemon socket(s) to connect to
  -l, --log-level string   Set the logging level
                           ("debug"|"info"|"warn"|"error"|"fatal")
                           (default "info")
      --tls                Use TLS; implied by --tlsverify
      --tlscacert string   Trust certs signed only by this CA (default
                           "C:\\Users\\Alessandro Maggio\\.docker\\ca.pem")
      --tlscert string     Path to TLS certificate file (default
                           "C:\\Users\\Alessandro Maggio\\.docker\\cert.pem")
      --tlskey string      Path to TLS key file (default
                           "C:\\Users\\Alessandro Maggio\\.docker\\key.pem")
      --tlsverify          Use TLS and verify the remote
  -v, --version            Print version information and quit

Management Commands:
  config      Manage Docker configs
  container   Manage containers
  image       Manage images
  network     Manage networks
  node        Manage Swarm nodes
  plugin      Manage plugins
  secret      Manage Docker secrets
  service     Manage services
  stack       Manage Docker stacks
  swarm       Manage Swarm
  system      Manage Docker
  trust       Manage trust on Docker images
  volume      Manage volumes

Commands:
  attach      Attach local standard input, output, and error streams to a running container
  build       Build an image from a Dockerfile
  commit      Create a new image from a container's changes
  cp          Copy files/folders between a container and the local filesystem
  create      Create a new container
  deploy      Deploy a new stack or update an existing stack
  diff        Inspect changes to files or directories on a container's filesystem
  events      Get real time events from the server
  exec        Run a command in a running container
  export      Export a container's filesystem as a tar archive
  history     Show the history of an image
  images      List images
  import      Import the contents from a tarball to create a filesystem image
  info        Display system-wide information
  inspect     Return low-level information on Docker objects
  kill        Kill one or more running containers
  load        Load an image from a tar archive or STDIN
  login       Log in to a Docker registry
  logout      Log out from a Docker registry
  logs        Fetch the logs of a container
  pause       Pause all processes within one or more containers
  port        List port mappings or a specific mapping for the container
  ps          List containers
  pull        Pull an image or a repository from a registry
  push        Push an image or a repository to a registry
  rename      Rename a container
  restart     Restart one or more containers
  rm          Remove one or more containers
  rmi         Remove one or more images
  run         Run a command in a new container
  save        Save one or more images to a tar archive (streamed to STDOUT by default)
  search      Search the Docker Hub for images
  start       Start one or more stopped containers
  stats       Display a live stream of container(s) resource usage statistics
  stop        Stop one or more running containers
  tag         Create a tag TARGET_IMAGE that refers to SOURCE_IMAGE
  top         Display the running processes of a container
  unpause     Unpause all processes within one or more containers
  update      Update configuration of one or more containers
  version     Show the Docker version information
  wait        Block until one or more containers stop, then print their exit codes

Run 'docker COMMAND --help' for more information on a command.

C:\>
Docker Pull
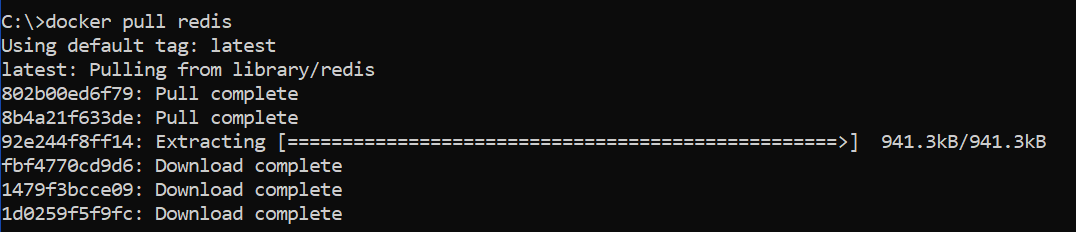
Now that we have the software installed, the first step of this “how to use docker” is to get a docker image. If you install the OS of a machine from a DVD or the OS of a VM from an ISO file, you install docker containers from docker images. However, you need to get those images first, and that’s what the docker pull command does. Docker automatically connects to the docker servers (the Docker Hub) and search for public images available to the public. You can also configure your docker to pull images from a private repository, but we won’t do that today.
You can browse the Docker Hub here and look for an image you would like to run. Any will do, as we just need to learn how to work with docker, not with the software inside the container. In our example, we will use the Redis container. In case you are curious, Redis is a performance data structure that runs entirely in RAM, not on the disk. To pull it, we simply run docker pull redis. This will happen:
Eventually, the download and extraction will finish. Once it does, you can check the images you have with docker image ls. For me, the output is the following as I also have other docker images installed. However, the important thing here is the image we just downloaded: Redis. We can see it on the first line.

Docker run
Now we really get into our how to use docker. The docker run command allows you to run containers based on images. It is like running a virtual machine with a specific OS, only with containers. Here, instead of selecting the OS, you select the image. You can simply run docker run followed by the image name, but this will create a container with no name and only an ugly ID. Instead, you can give your container a name with the --name option. Another option you want to use is -d, which runs the container in the background.
For example, you can use docker run --name my-redis-container -d redis. This will run the container. However, you generally need to access your container on some TCP or UDP ports. If you don’t specify them, the container will use the default ones specified from the image (or to be more specific, the docker configuration of the image). In case you want to change them, you can use -p, followed by the binding <container port>:<host port>. Imagine you have a webserver container exposing port 80, but you want to use that port. Instead, you want users connecting to your docker server on port 8080 to reach the container on port 80. You can do that with -p 80:8080. If you want to stick with default ports and use them all, you can use -P (uppercase) instead. We don’t need to do that with this container, default (which for Redis is port 6379) will do.
Running a container as detached (-d) will print the container ID.
C:\>docker run --name my-redis-container -d redis
6b9619bb1d618ab5c22edc25dfd5c492c6ccec8ea2639043fd1153b661187a6b
Listing containers
Now we can see it in the list of containers, with docker container ls.

This will show only the active containers. In case you want to see all the containers you have, including the ones that are not running at the moment, use docker container ls -a. However, if you only have the Redis container, the output will be identical for you.
Manage docker containers
To say you know how to use docker, you need to know how to manage your docker containers. Now, a container is like a virtual machine. It is an instance of the image, and you can configure and tune the container in the way you’d like. Thus, you typically don’t want to destroy a container unless its days are over. Instead, you might need to shut it down and turn it back on from time to time. We can do that with two commands, both followed by the container name or ID: docker stop and docker start.
C:\>docker stop my-redis-container
my-redis-container

C:\>docker start my-redis-container
my-redis-container

C:\>
Another important command is exec, which allows you to run commands inside the container like you would run CLI commands inside a virtual machine. For example, we could run docker exec my-redis-container pwd to run the pwd command inside the container.
C:\>docker exec my-redis-container pwd
/data

C:\>
Storage persistence
The last part of our how to use docker is about storage. By default, each container stores its information in a volume. Docker automatically creates a volume when you create a container with docker run, and then destroys it when the container is destroyed. You might want to have the volume to continue existing even when the container ceases to exist. For example, you may want to attach that volume to another container later on. If that’s the case, you first need to create a volume with docker volume create, followed by the volume name. You can also list all your volumes with docker volume ls.
Then, when running a container, you specify to use a pre-created volume with -v, followed by the volume name.
The Dockerfile
The dockerfile is a specific file with a specific syntax that defines the environment in your container. Images come with their default dockerfile, but you may want to extend it to automate part of containers’ deployment (in production, you will have to run lots of containers). Furthermore, using a docker file allows you to create your own, custom, container. We won’t face this in this guide, as this is somewhat more advanced. However, just know it exists and that you can use it to tailor the containers to your needs.
In Summary
In this article, we saw how to use Docker to create and manage containers from existing images. You can now run your small container-based data center even on your laptop and create better applications. In fact, this article gives you the foundation for microservices deployment.
What do you think about docker? Do you see yourself using it often? Let me know your opinions on containers in the comments!

