
In the articles, we already discussed DNS. In fact, we know what is DNS, and how to troubleshoot it. However, we never mentioned how to actually implement it. Now, you can configure two types of DNS: private or public. A private DNS serves only your organization, and we will not cover that today. Instead, we will cover one of the best ways to manage public DNS. I am talking about Route 53, the product that Amazon offers to manage public (but also private) DNS zones. In AWS Route 53 Tutorial we will see how to use this product for public DNS.
AWS Route 53 Tutorial
Getting started with AWS
AWS stands for Amazon Web Services, and it is the Amazon cloud platform. With no special requirement, you can access many services from DNS to Artificial Intelligence, with a few clicks. Furthermore, you only pay for the time you use them, there is no upfront commitment. Even better, with one single AWS account, you get access to all the services Amazon has to offer.
So, if you haven’t already, you need to register to AWS. That’s not the same Amazon account you use to buy your stuff or watch your Prime video series, you need a different account instead. To register to AWS, go to the AWS console. You will go through a guided setup, you will have to insert your credit card details, and most likely you will get some services free for 1 year if this is the first time you join AWS.
Once you have your account ready, sign in. You will get to the console, where you can control all the services you have active with AWS. If you are curious about the services AWS has to offer, you can read this post on how to use AWS.
Enter Route 53
Now we can start with our Route 53 Tutorial. On the top left of the screen, you will have the services menu. Open it, and in here, use the search box to look for Route 53. You can also search with the “DNS” keyword.

Once inside Route 53, you will have four things that you can configure.
- Hosted zones, they contain DNS records
- Health checks, programmatic checks that verify a DNS entry is resolving correctly
- Traffic policies, these are custom DNS entries that resolve differently based on some criteria, like geolocation
- Registered domains, domains you can register like example.com
Registering a domain
If we want to go for public DNS, the first thing we need to do is to register a domain. Thus, use the menu on the left to reach the Registered domains page.
Here, you will see the list of domains you have registered. Of course, you will start with none, so you can see an empty list or a welcome screen. Regardless of what you see, use the button to create a new domain (Register domain). You may also want to transfer an existing domain that you have on another provider.

Both for register and transfer, you will have to follow a Wizard. Note that AWS can register only some top domains, and not all. For example, it can register .com, but not .com.br. The Wizard will ask you the contacts for your domain, and also if you want to create a hosted zone for the domain. This means: do you want to manage your DNS entries inside AWS? We say yes.
We also have the option to use an existing hosted zone, but we haven’t created any, so we cannot follow that today. Anyway, the concept is still the same. Should you forget to create a hosted zone, you can create one by entering in the domain from registered domains, and click on Manage DNS. Once you create it, you can manage it from the hosted zones section.
Creating DNS entries
The hosted zone is the place where you define DNS entries. For example, here we are using mynewdomain.com. If you click on the hosted zone, you will get a panel where you can configure DNS entries. In this panel, you see all the entries you already have. You can create more by clicking on Create Record Set and filling the record information on the right.

If you are migrating from another provider, you can click on Import Zone File, and then paste inside it the zone file you exported from your other provider.
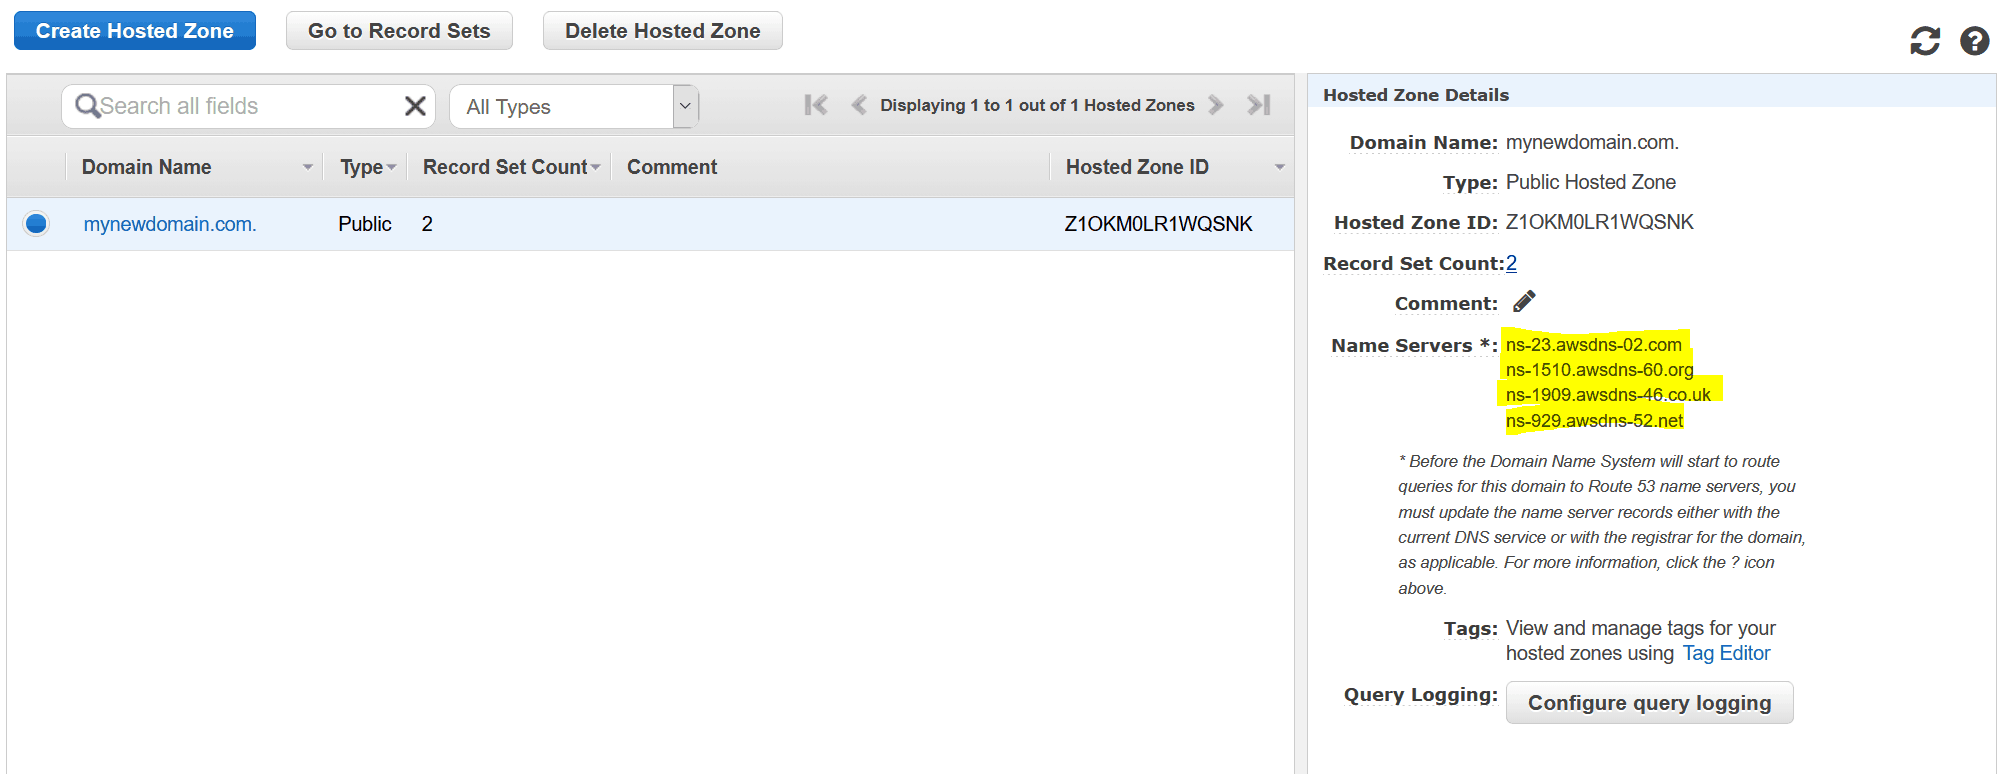
Something worth mentioning is that you don’t need to register your domain in AWS. In fact, you can use AWS only for DNS, while leaving domain registration on another provider. In that case, you need to edit the name servers for your domain on the other provider. You will need to put the ones of your AWS zone. Where do you find them? It is simple, select the zone from the list without entering in it, and look at the name servers.
Health Checks
Health checks are not something natively part of DNS. However, AWS offers this service which can be really nice for critical applications. They allow you to monitor the status of HTTP, HTTPS, or TCP applications. You can then use them inside a traffic policy. For example, you may have multiple servers across the globe that serve a website in HTTPS. First, you create a health check for each node. Then, you configure a traffic policy so that in case the Singapore node is down, the DNS resolution for Singapore will resolve with the IP of Hong Kong instead.
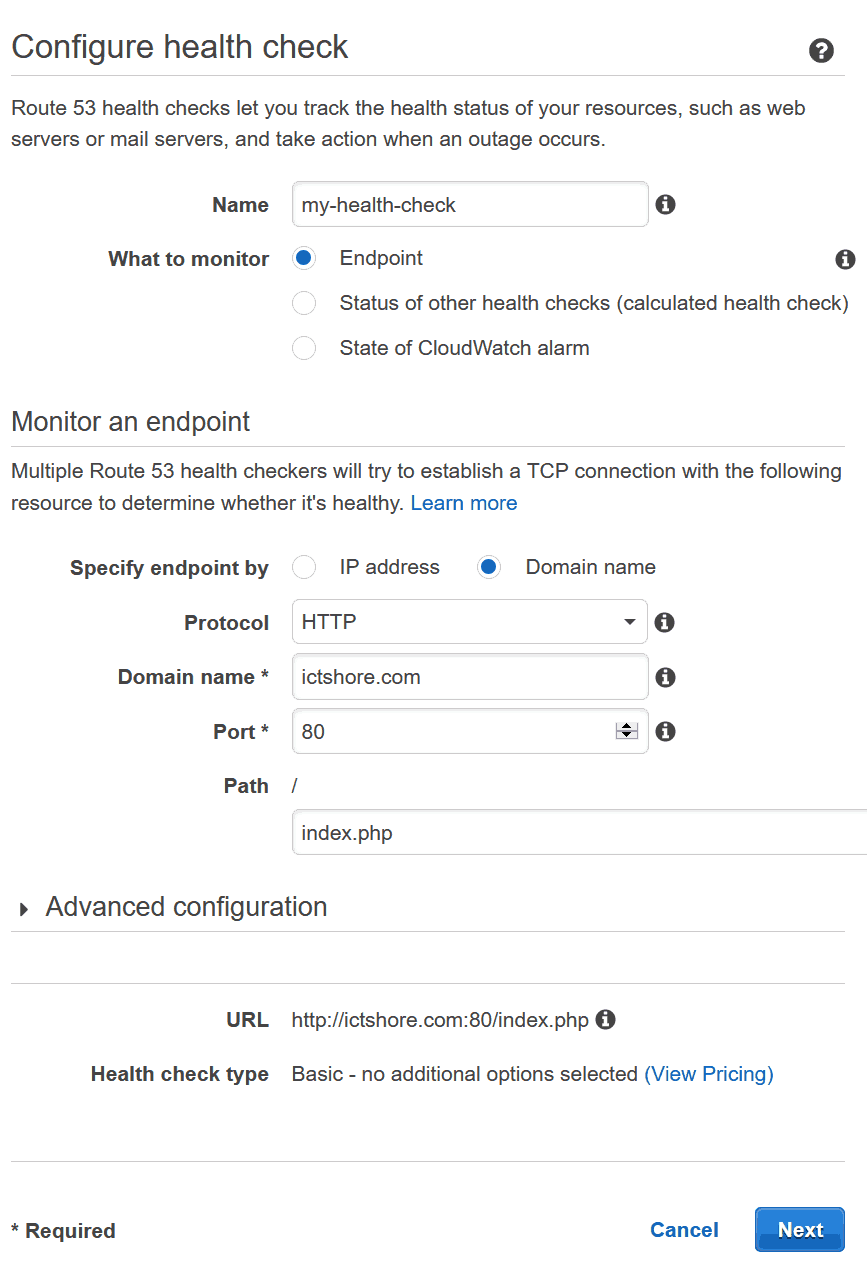
Creating a health check is very simple. You only need to give it a name and configure what to monitor and how. If you go with HTTP or HTTPS, you can also monitor a specific URL.
Traffic Policy
Traffic policies are the most complex part of Route 53. Yet, they are the most powerful. A traffic policy allows you to configure dynamic DNS failover around the world, geolocation of resolution and other customizations. You configure traffic policies with a visual editor that allows you to create an algorithm with some building blocks. Furthermore, you embed versions in your policy, so that you can quickly revert back if needed.
Creating a traffic policy is an advanced task, and would require a post dedicated to it, so we won’t explore that for now. However, explore it freely, maybe the best way to learn how to use them is by trial and error.
Final words on AWS Route 53
In this tutorial, we saw how to use Route 53 in various ways. From registering a domain, to configuring simple DNS entries, up to health checks and traffic policies. However, if you just want to stick with the basics, you may be left wondering why to use AWS. This depends on a case by case, but here is some key information to evaluate.
The Pros
- AWS offers a 100% SLA on Route 53, it will always be available
- One centralized controls to manage everything
- Custom configurations not normally available without specific appliances
The cons
- Slightly more costly. In AWS, you pay for registering the domain, for having a hosted zone (about 0.50$ a month), and a tiny amount for the queries you receive (cents for millions of queries).
- Variable pricing, as you don’t know exactly how much you are going to spend.
In my opinion, Route 53 is simply a must for large companies. You may don’t need it if you are on your own, but think about the reputation damage you may get if your website is down. Or if your email is down. If you feel like it would be quite bad, maybe these are money worth spending.
What do you think about Route 53? Is it something worth using? Let me know in the comments.

